
Easy fall kid’s craft to make with any age to celebrate and learn all about fall. A great keepsake to see how big your baby’s hands were this fall. Plus the possibilities to customize are endless!

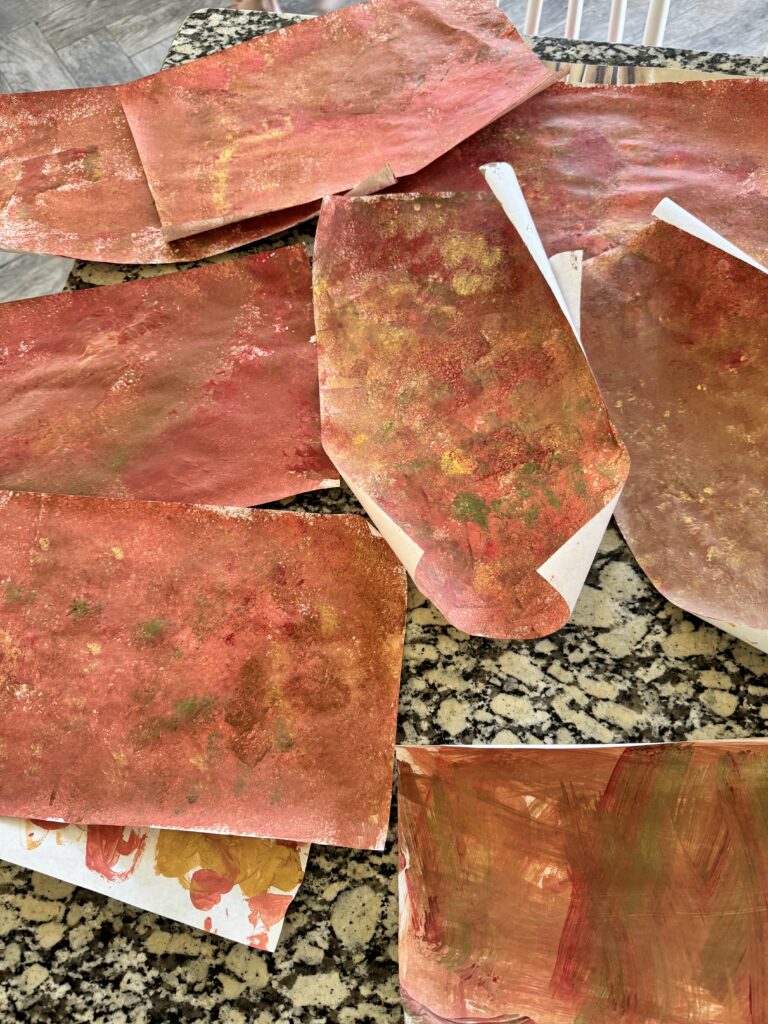
My kids and I had such a great time making this easy fall wreath! It was simple but turned out so cute and something I can keep and hang up for next fall. Maybe even for years to come. We decided to sponge paint paper with fall colors because we really love to paint! But if the idea of 3 young kids with paint is not your thing you can absolutely skip that step. Trust me, some days it is definitely NOT my thing either. You can use colorful construction paper, or even use crayons, colored pencils, markers. Whatever you feel most comfortable with or whatever is going to make it more enjoyable for everyone!

Nobody is going to be enjoying this craft if you are stressed about flinging art supplies. Trying to keep a kid in an art bubble never works! If you are new to having your kid do paint projects here are some tips I use when deciding it’s a good idea to bust out the paint supplies.
Tips to keep your sanity while painting with kids
- When it comes to kids painting, I strongly advise to have everything prepped and ready BEFORE you pour any paint! Anyone that has done painting with a child knows that once they see paint paint, they have to touch it. I don’t know what it is in their brains, but they just simply cant help themselves, so be ready.
- I like to have wipes or a wet rag handy for quick cleanups for flings, drips, or spills.
- I strongly recommend to have art aprons, old shirt, or even naked painting! But never, and I truly mean NEVER think your child will not get any paint on themselves. Honestly, I treat myself the same way when I do any painting. I always put an apron or old shirt on. I actually have a box of old clothes to wear for projects that still fit but have a stain, hole, etc.
- Protect your table! i have an old plastic shower curtain I use as a painting drop cloth. You can use an old sheet, towel, even a trash bag! I’ve tried little plastic place mats and they are never big enough!
- Use washable paint when possible! This doesn’t always work, like when you paint rocks to go in a garden. But for paper and crafts displayed inside, washable always!
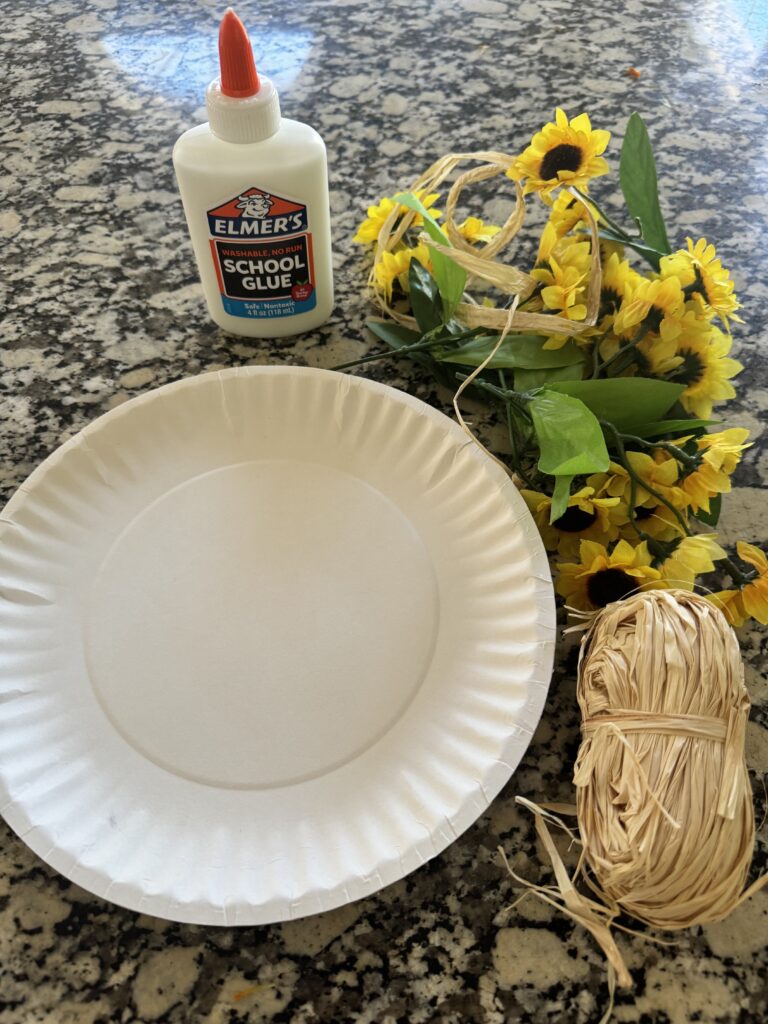
Materials you will need for the fall craft:
- Paper plate(or thick paper cut into a circle)
- Paper to cut handprints (white to paint or colorful)
- String/twine
- Craft glue
- Scissors
- Marker
Optional Materials:
- Paint
- Sponge/ paint brushes
- fake flowers/extra decorations
- Hot glue gun
- Hot glue stick
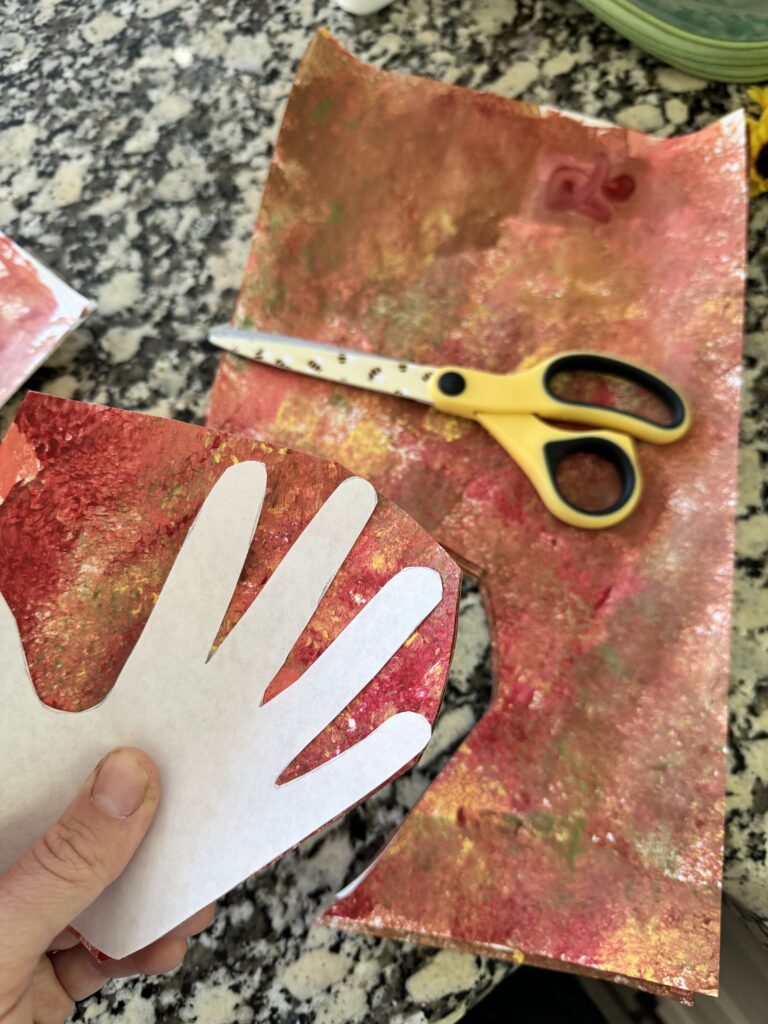
Once you’ve decide if you are going to commit to painting, gather your papers and scissors to cut out your child’s handprints
I traced my kid’s hands on plain white paper to use as a template, then I layered 4-5 pieces of paper under the “template” to cut out because I didn’t want to cut out 30 handprints individually.
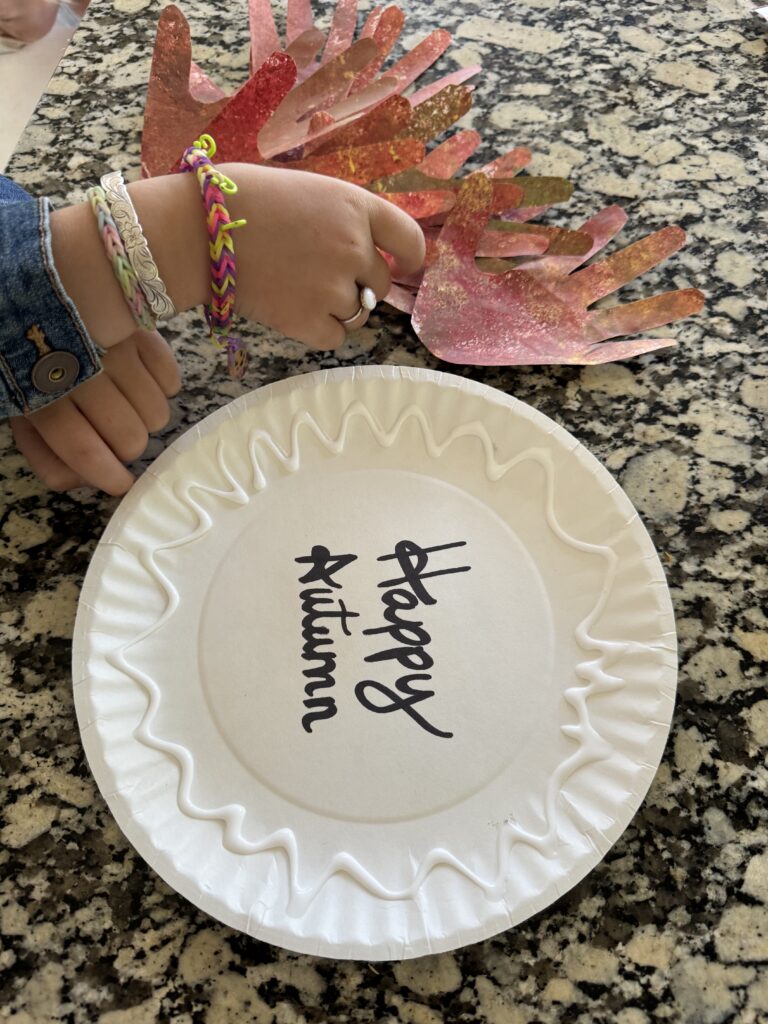
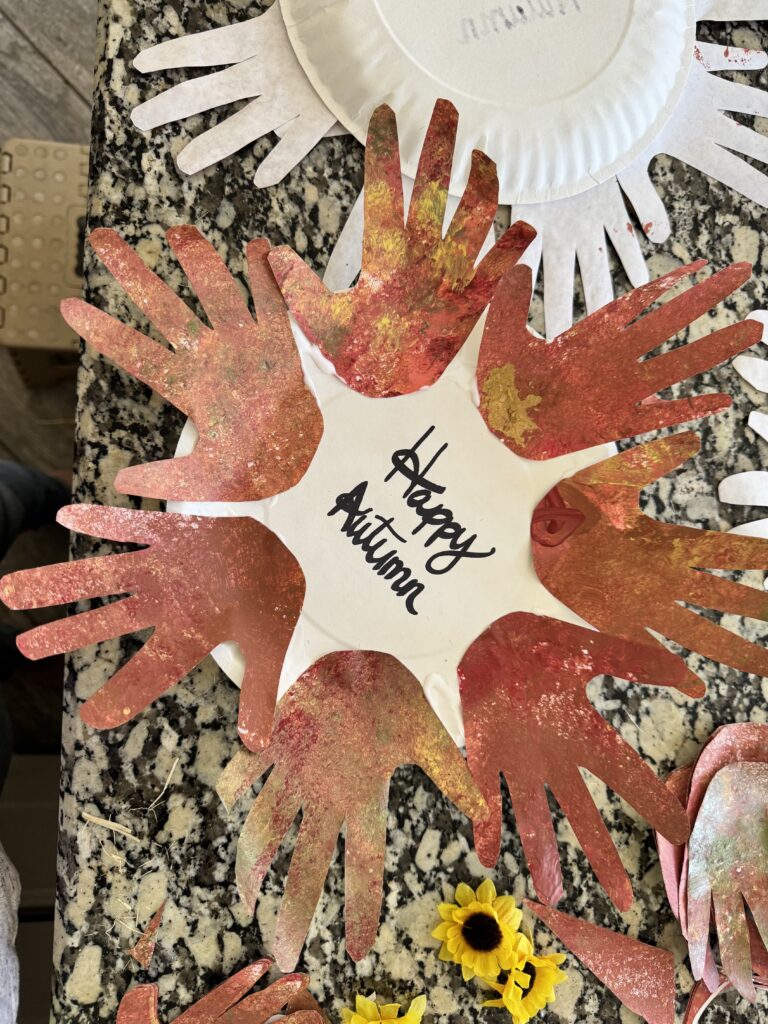
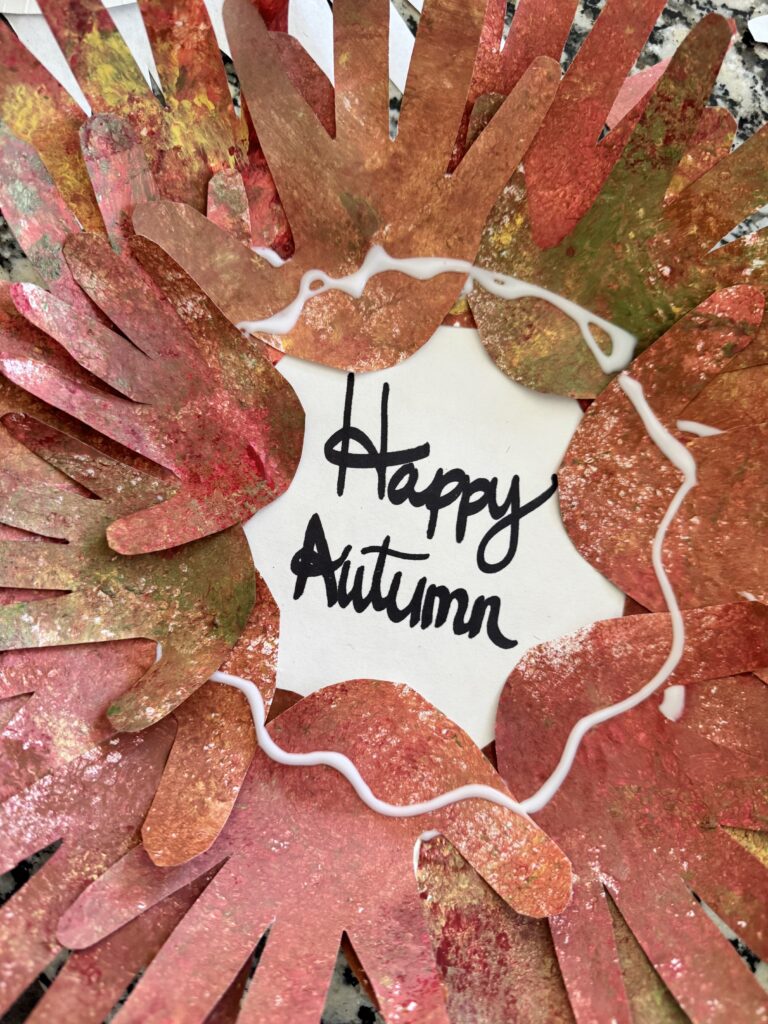
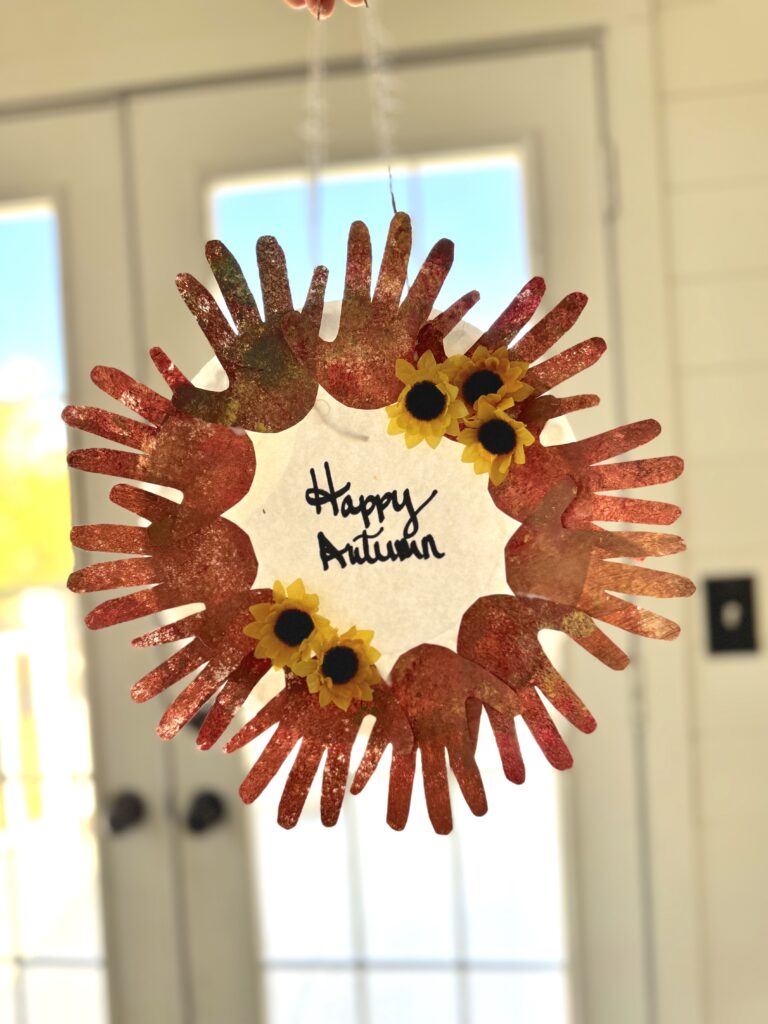
Once you have all the handprints cut out, write on the paper plate what you want your wreath to say. I wrote “Happy Autumn” but you can put anything! “Happy Fall”, “Happy Fall Y’all” etc. or you can ask your child what they want it to say. I used this opportunity to teach what Autumn is. Now you can (or have your child) glue the handprints around the paper plate. I did lay them around ahead of time to make sure I liked the spacing and to make sure I cut out enough hand prints.
There are a couple different options for the amount of handprints you put on the wreath. For one child a single layer of handprints does just fine, but for a wreath made by more than one child layering the handprints works well, you could even do your handprint behind your child’s to see how small they are this fall…am I the only one tearing up now?
If you are layering, make sure you put the biggest hands prints on first then the smaller ones on the next layer.
If you are only doing one child per wreath, one layer is cute and simple. At this point you can either add some extra decor like fake flowers, a pumpkin cutout, stickers etc. get creative! I used a hot glue gun to do the fake flowers because I didn’t think the craft glue would hold them well. Obviously use with caution around children! I did use the hot glue gun and my older children placed the flowers in the glue so they still felt like they were helping.
Once you feel like the wreath is complete, it’s time to glue on the twine/ string so you can hang and display your child’s beautiful creation! I also used hot glue for this step to make it extra secure, but you could probably use craft glue just fine or even tape.
I left the wreaths face down to dry for about an hour because of the glue and the paint, I didn’t want the fingers to curl. If the fingers do end up curling a bit I just bent/curled them back to straighten them.
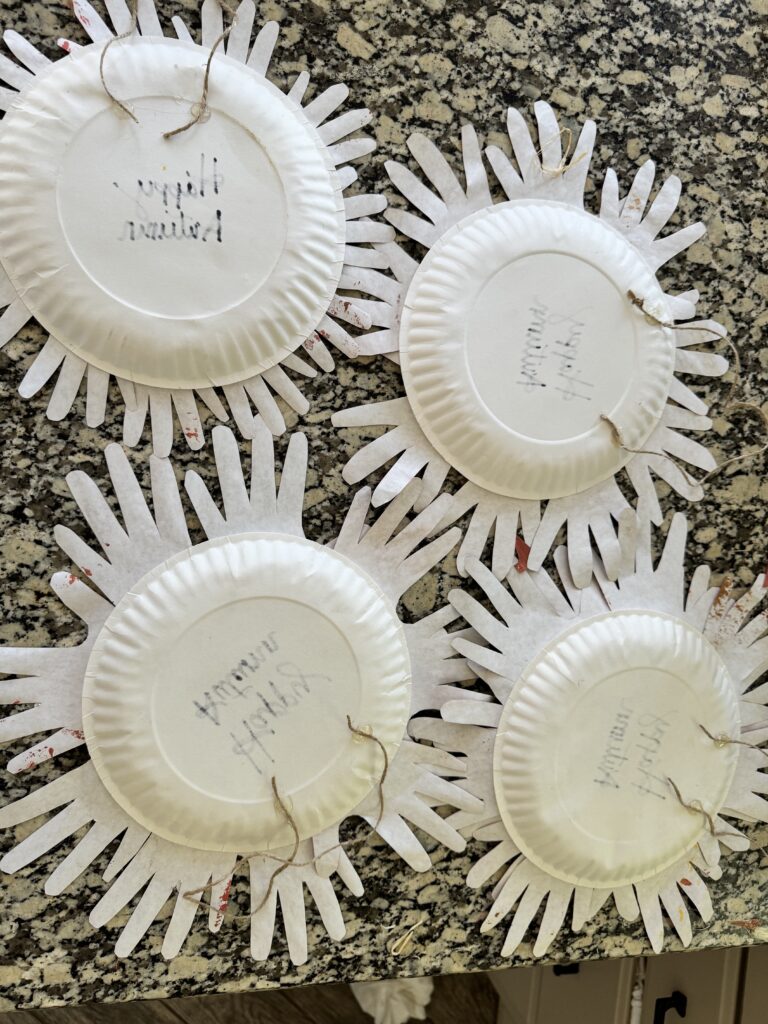
We made a total of 4 wreaths, 1 for each kid (single layer) to gift to someone they love, and 1 with all 3 of their hands layered for me to keep. I really love how it turned out!
What do you think of our easy fall kid craft? Please let me know if you have any questions.
To see how our experience was this fun, kid fall craft, go visit our instagram!
Great tips! Thank you!
thank you!
Fun! Can’t wait to try!!
I’d love to see how yours turns out!